W tym wpisie chciałbym opisać jak zainstalowac powłokę zsh i oh-my zsh, oraz skonfigurować ją tak jak lubię. Cały proces opisuję na świeżo zainstalowanym Arch Linux.
Instalacja zsh
W tym paragrafie przedstawię jak zainstalować powłokę zsh.
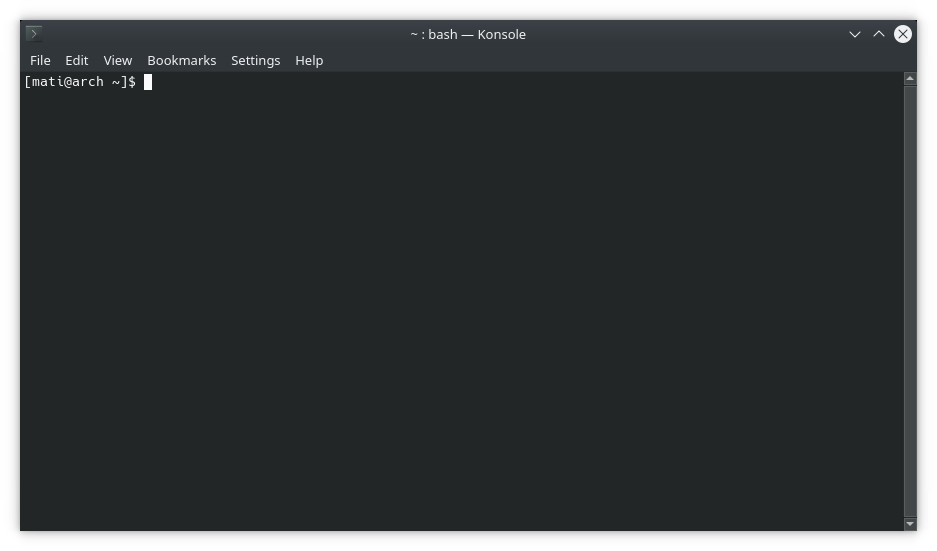
Zacznę od pokazanie jak wygląda wyjściowa wersja terminala jaki ukazuje się po zainstalowaniu KDE w systemie ArchLinux.

Po pierwsze powłokę wydając polecenie.
sudo pacman -S zshPo drugie, przechodzimy process inicializacji, który nie jest konieczny ale wskazany. Oczywiście można wybrać domyślne opcje. W ten sposób powłoka zsh zostanie wstępnie skonfigurowana.
zsh /usr/share/zsh/functions/Newuser/zsh-newuser-install -fInstalacja oh-my-zsh
Tematem tej części będzie zainstalowanie oh-my-zsh i ustawienie powłoki zsh jako domyślnej.
Wspomniane Oh-my-zsh jest to framework open-source umożliwiający zarządzanie i konfigurowanie wielu elementów powłoki takich jak skórki, pluginy i wiele więcej.
Aby zainstalować to narzędzie należy wykonać jedynie dwa polecenia, potwierdzając chęć jego wykonania poprzez kliknięci w „Y”
sudo pacman -S git wget

sh -c "$(wget -O- https://raw.githubusercontent.com/ohmyzsh/ohmyzsh/master/tools/install.sh)"
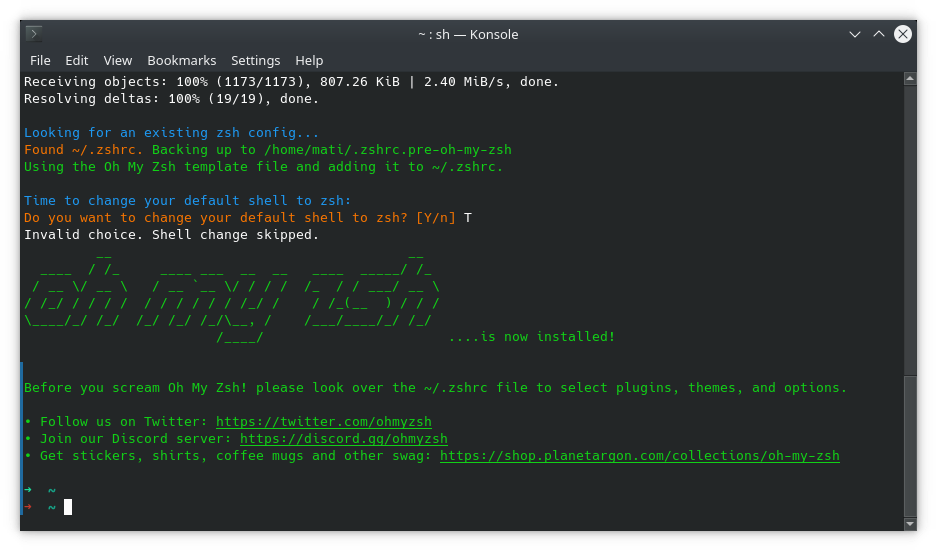
Po zainstalowaniu oh-my-zsh nasza konsola powinna wyglądać podobnie do tej

Pluginy
Kolejnym krokiem jest zainstalowanie ulubionych pluginów. Oczywiście ich list jest bardzo długa i każdy z czasem znajdzie coś dla siebie.
Wspomnianymi wcześniej pluginami z jakich ja korzystam, są:
plugins=(archlinux
	asdf
	bundler
	docker
	jsontools
	vscode
	web-search
	k
	tig
	gitfast
	colored-man-pages
	colorize
	command-not-found
	cp
	dirhistory
	autojump
	sudo
	zsh-syntax-highlighting)
Część z nich nie wymaga dodatkowych kroków, jednak część wymaga pewnej pracy. Potrzebne kroki opiszę poniżej.
git clone https://github.com/zsh-users/zsh-syntax-highlighting.git ${ZSH_CUSTOM:-~/.oh-my-zsh/custom}/plugins/zsh-syntax-highlightinggit clone https://github.com/zsh-users/zsh-autosuggestions ${ZSH_CUSTOM:-~/.oh-my-zsh/custom}/plugins/zsh-autosuggestionszsh-z
git clone https://github.com/agkozak/zsh-z $ZSH_CUSTOM/plugins/zsh-zk plugin
git clone https://github.com/supercrabtree/k $ZSH_CUSTOM/plugins/kautojump
git clone git://github.com/wting/autojump.git
cd autojump ./install.py
powerlevel9k theme + nerd font
git clone https://github.com/bhilburn/powerlevel9k.git ~/.oh-my-zsh/custom/themes/powerlevel9k

wget https://github.com/ryanoasis/nerd-fonts/raw/master/patched-fonts/Hack/Regular/complete/Hack%20Regular%20Nerd%20Font%20Complete.ttf

sudo cp Hack\ Regular\ Nerd\ Font\ Complete.ttf /usr/share/fonts
Poskładanie tego w całość
Aby poskładać to w jedną działającą całość, potrzebna jest odpowiednia edycja pliku .zshrc
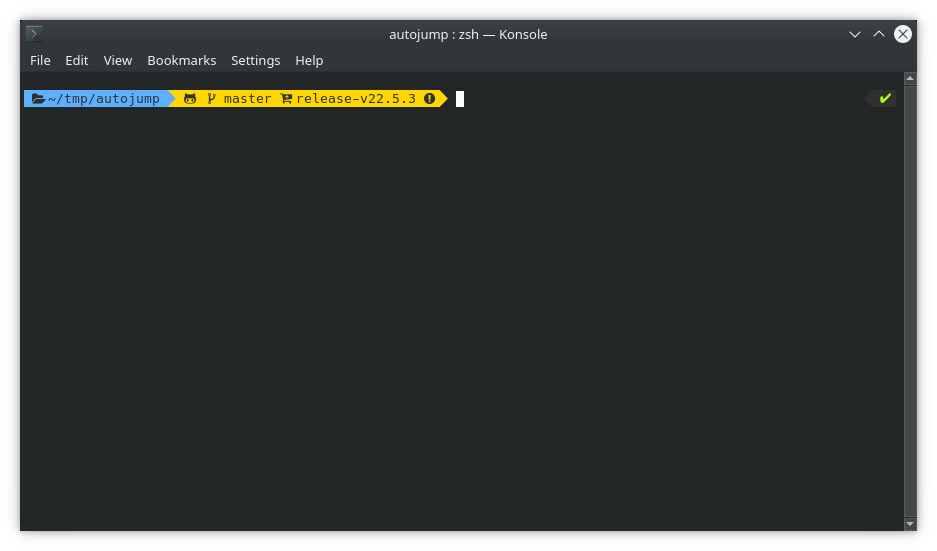
Obecnie wygląd konsoli powinien prezentować się mniej więcej tak

Na samym dole wkleję zawartość tego pliku jaką posiadam w tym momencie, ale najpierw jeszcze jedna użyteczna rzecz.
Gdy już mamy skonfigurowany plik .zshrc i pewnie jeszcze kilka innych podobnych plików, w zależności od tego z jakich aplikacji korzystamy, bardzo użyteczne może okazać się bezpieczne przechowywanie i wersjonowanie takich plików, a przy okazji bardzo szybka możliwość ich przywrócenia. Jak to osiągnąć opisałem w tym poście
zawartość pliku .zshrc
export LANG="en_US.UTF-8"

# Path to your oh-my-zsh installation.
ZSH=$HOME/.oh-my-zsh/

export DEFAULT_USER="mati"
export TERM="xterm-256color"
export ZSH=$HOME/.oh-my-zsh

ZSH_THEME="powerlevel9k/powerlevel9k"
POWERLEVEL9K_MODE="nerdfont-complete"
source $ZSH/custom/themes/powerlevel9k/powerlevel9k.zsh-theme

# Set P9KGT background color, either 'light' or 'dark' (this should match the GNOME Terminal's theme).
P9KGT_BACKGROUND='dark'
if [[ $P9KGT_BACKGROUND != 'light' ]] && [[ $P9KGT_BACKGROUND != 'dark' ]]
then
    P9KGT_ERROR=true
    echo "P9KGT error: variable 'P9KGT_BACKGROUND' should be either 'light' or 'dark'"
fi

# Set P9KGT color scheme, either 'light', 'dark' or 'bright' (choose by preference).
P9KGT_COLORS='bright'
if [[ $P9KGT_COLORS != 'light' ]] && [[ $P9KGT_COLORS != 'dark' ]] && [[ $P9KGT_COLORS != 'bright' ]]
then
    P9KGT_ERROR=true
    echo "P9KGT error: variable 'P9KGT_COLORS' should be either 'light', 'dark' or 'bright'"
fi

# Set P9KGT fonts mode, either 'default', 'awesome-fontconfig', 'awesome-mapped-fontconfig', 'awesome-patched', 'nerdfont-complete' or 'nerdfont-fontconfig'.
# https://github.com/bhilburn/powerlevel9k/wiki/About-Fonts
P9KGT_FONTS='awesome-fontconfig'
if [[ $P9KGT_FONTS != 'default' ]] && [[ $P9KGT_FONTS != 'awesome-fontconfig' ]] && [[ $P9KGT_FONTS != 'awesome-mapped-fontconfig' ]] &&
    [[ $P9KGT_FONTS != 'awesome-patched' ]] && [[ $P9KGT_FONTS != 'nerdfont-complete' ]] && [[ $P9KGT_FONTS != 'nerdfont-fontconfig' ]]
then
    P9KGT_ERROR=true
    echo "P9KGT error: variable 'P9KGT_FONTS' should be either 'default', 'awesome-fontconfig', 'awesome-mapped-fontconfig', 'awesome-patched', 'nerdfont-complete' or 'nerdfont-fontconfig'"
else
    POWERLEVEL9K_MODE=$P9KGT_FONTS
fi

if [[ $P9KGT_ERROR != true ]]
then

    # Set P9KGT background color
    if [[ $P9KGT_BACKGROUND == 'light' ]]
    then
        # https://github.com/bhilburn/powerlevel9k/wiki/Stylizing-Your-Prompt#light-color-theme
        POWERLEVEL9K_COLOR_SCHEME='light'
        P9KGT_TERMINAL_BACKGROUND=231
    elif [[ $P9KGT_BACKGROUND == 'dark' ]]
    then
        POWERLEVEL9K_COLOR_SCHEME='dark'
        P9KGT_TERMINAL_BACKGROUND=236
    fi

    # Set P9KGT foreground colors
    if [[ $P9KGT_COLORS == 'light' ]]
    then
        P9KGT_RED=009
        P9KGT_GREEN=010
        P9KGT_YELLOW=011
        P9KGT_BLUE=012
    elif [[ $P9KGT_COLORS == 'dark' ]]
    then
        P9KGT_RED=001
        P9KGT_GREEN=002
        P9KGT_YELLOW=003
        P9KGT_BLUE=004
    elif [[ $P9KGT_COLORS == 'bright' ]]
    then
        P9KGT_RED=196
        #P9KGT_GREEN=148
        P9KGT_GREEN=154
        P9KGT_YELLOW=220
        P9KGT_BLUE=075
    fi

    # Customize prompt
    # https://github.com/bhilburn/powerlevel9k/wiki/Stylizing-Your-Prompt#adding-newline-before-each-prompt
    POWERLEVEL9K_PROMPT_ADD_NEWLINE=true
    # https://github.com/bhilburn/powerlevel9k/tree/next#customizing-prompt-segments
    POWERLEVEL9K_LEFT_PROMPT_ELEMENTS=(context dir_writable dir vcs)
    POWERLEVEL9K_RIGHT_PROMPT_ELEMENTS=(status root_indicator background_jobs)

    # Set 'context' segment colors
    # https://github.com/bhilburn/powerlevel9k/blob/next/segments/context/README.md
    POWERLEVEL9K_CONTEXT_DEFAULT_FOREGROUND=$P9KGT_YELLOW
    POWERLEVEL9K_CONTEXT_ROOT_FOREGROUND=$P9KGT_YELLOW
    POWERLEVEL9K_CONTEXT_SUDO_FOREGROUND=$P9KGT_YELLOW
    POWERLEVEL9K_CONTEXT_REMOTE_FOREGROUND=$P9KGT_YELLOW
    POWERLEVEL9K_CONTEXT_REMOTE_SUDO_FOREGROUND=$P9KGT_YELLOW
    POWERLEVEL9K_CONTEXT_DEFAULT_BACKGROUND=$P9KGT_TERMINAL_BACKGROUND
    POWERLEVEL9K_CONTEXT_ROOT_BACKGROUND=$P9KGT_TERMINAL_BACKGROUND
    POWERLEVEL9K_CONTEXT_SUDO_BACKGROUND=$P9KGT_TERMINAL_BACKGROUND
    POWERLEVEL9K_CONTEXT_REMOTE_BACKGROUND=$P9KGT_TERMINAL_BACKGROUND
    POWERLEVEL9K_CONTEXT_REMOTE_SUDO_BACKGROUND=$P9KGT_TERMINAL_BACKGROUND

    # Set 'dir_writable' segment colors
    # https://github.com/bhilburn/powerlevel9k/blob/next/segments/dir_writable/README.md
    POWERLEVEL9K_DIR_WRITABLE_FORBIDDEN_FOREGROUND=$P9KGT_YELLOW
    POWERLEVEL9K_DIR_WRITABLE_FORBIDDEN_BACKGROUND=$P9KGT_RED

    # Set 'dir' segment colors
    # https://github.com/bhilburn/powerlevel9k/blob/next/segments/dir/README.md
    POWERLEVEL9K_DIR_DEFAULT_FOREGROUND=$P9KGT_TERMINAL_BACKGROUND
    POWERLEVEL9K_DIR_HOME_FOREGROUND=$P9KGT_TERMINAL_BACKGROUND
    POWERLEVEL9K_DIR_HOME_SUBFOLDER_FOREGROUND=$P9KGT_TERMINAL_BACKGROUND
    POWERLEVEL9K_DIR_ETC_FOREGROUND=$P9KGT_TERMINAL_BACKGROUND
    POWERLEVEL9K_DIR_DEFAULT_BACKGROUND=$P9KGT_BLUE
    POWERLEVEL9K_DIR_HOME_BACKGROUND=$P9KGT_BLUE
    POWERLEVEL9K_DIR_HOME_SUBFOLDER_BACKGROUND=$P9KGT_BLUE
    POWERLEVEL9K_DIR_ETC_BACKGROUND=$P9KGT_BLUE

    # Set 'vcs' segment colors
    # https://github.com/bhilburn/powerlevel9k/blob/next/segments/vcs/README.md
    POWERLEVEL9K_VCS_CLEAN_FOREGROUND=$P9KGT_TERMINAL_BACKGROUND
    POWERLEVEL9K_VCS_MODIFIED_FOREGROUND=$P9KGT_TERMINAL_BACKGROUND
    POWERLEVEL9K_VCS_CLOBBERED_FOREGROUND=$P9KGT_TERMINAL_BACKGROUND
    POWERLEVEL9K_VCS_UNTRACKED_FOREGROUND=$P9KGT_TERMINAL_BACKGROUND
    POWERLEVEL9K_VCS_CLEAN_BACKGROUND=$P9KGT_GREEN
    POWERLEVEL9K_VCS_MODIFIED_BACKGROUND=$P9KGT_YELLOW
    POWERLEVEL9K_VCS_CLOBBERED_BACKGROUND=$P9KGT_RED
    POWERLEVEL9K_VCS_UNTRACKED_BACKGROUND=$P9KGT_GREEN

    # Set 'status' segment colors
    # https://github.com/bhilburn/powerlevel9k/blob/next/segments/status/README.md
    POWERLEVEL9K_STATUS_CROSS=true
    POWERLEVEL9K_STATUS_OK_FOREGROUND=$P9KGT_GREEN
    POWERLEVEL9K_STATUS_ERROR_FOREGROUND=$P9KGT_RED
    POWERLEVEL9K_STATUS_OK_BACKGROUND=$P9KGT_TERMINAL_BACKGROUND
    POWERLEVEL9K_STATUS_ERROR_BACKGROUND=$P9KGT_TERMINAL_BACKGROUND

    # Set 'root_indicator' segment colors
    # https://github.com/bhilburn/powerlevel9k/blob/next/segments/root_indicator/README.md
    POWERLEVEL9K_ROOT_INDICATOR_FOREGROUND=$P9KGT_YELLOW
    POWERLEVEL9K_ROOT_INDICATOR_BACKGROUND=$P9KGT_TERMINAL_BACKGROUND

    # Set 'background_jobs' segment colors
    # https://github.com/bhilburn/powerlevel9k/blob/next/segments/background_jobs/README.md
    POWERLEVEL9K_BACKGROUND_JOBS_FOREGROUND=$P9KGT_TERMINAL_BACKGROUND
    POWERLEVEL9K_BACKGROUND_JOBS_BACKGROUND=$P9KGT_YELLOW

fi
HYPHEN_INSENSITIVE="true"
COMPLETION_WAITING_DOTS="true"
# /!\ do not use with zsh-autosuggestions

plugins=(archlinux
	asdf
	bundler
	docker
	jsontools
	vscode
	web-search
	k
	tig
	gitfast
	colored-man-pages
	colorize
	command-not-found
	cp
	dirhistory
	autojump
	sudo
	zsh-syntax-highlighting)
# /!\ zsh-syntax-highlighting and then zsh-autosuggestions must be at the end

source $ZSH/oh-my-zsh.sh

ZSH_HIGHLIGHT_HIGHLIGHTERS=(main brackets pattern cursor)
typeset -gA ZSH_HIGHLIGHT_STYLES
ZSH_HIGHLIGHT_STYLES[cursor]='bold'

ZSH_HIGHLIGHT_STYLES[alias]='fg=green,bold'
ZSH_HIGHLIGHT_STYLES[suffix-alias]='fg=green,bold'
ZSH_HIGHLIGHT_STYLES[builtin]='fg=green,bold'
ZSH_HIGHLIGHT_STYLES[function]='fg=green,bold'
ZSH_HIGHLIGHT_STYLES[command]='fg=green,bold'
ZSH_HIGHLIGHT_STYLES[precommand]='fg=green,bold'
ZSH_HIGHLIGHT_STYLES[hashed-command]='fg=green,bold'

rule () {
	print -Pn '%F{blue}'
	local columns=$(tput cols)
	for ((i=1; i<=columns; i++)); do
	   printf "\u2588"
	done
	print -P '%f'
}

function _my_clear() {
	echo
	rule
	zle clear-screen
}
zle -N _my_clear
bindkey '^l' _my_clear

# aliases

alias config='/usr/bin/git --git-dir=$HOME/.dotfiles --work-tree=$HOME'

# Ctrl-O opens zsh at the current location, and on exit, cd into ranger's last location.
ranger-cd() {
	tempfile=$(mktemp)
	ranger --choosedir="$tempfile" "${@:-$(pwd)}" < $TTY
	test -f "$tempfile" &&
	if [ "$(cat -- "$tempfile")" != "$(echo -n `pwd`)" ]; then
	cd -- "$(cat "$tempfile")"
	fi
	rm -f -- "$tempfile"
	# hacky way of transferring over previous command and updating the screen
	VISUAL=true zle edit-command-line
}
zle -N ranger-cd
bindkey '^o' ranger-cd

# Uncomment the following line to disable bi-weekly auto-update checks.
DISABLE_AUTO_UPDATE="true"

ZSH_CACHE_DIR=$HOME/.cache/oh-my-zsh
if [[ ! -d $ZSH_CACHE_DIR ]]; then
  mkdir $ZSH_CACHE_DIR
fi

source $ZSH/oh-my-zsh.sh
Linkografia: https://medium.com/tech-notes-and-geek-stuff/install-zsh-on-arch-linux-manjaro-and-make-it-your-default-shell-b0098b756a7a https://medium.com/@christyjacob4/powerlevel9k-themes-f400759638c2
2 thoughts on “ZSH i oh-my-zsh – instalujemy nową powłokę i dodatki”
Hej, fajny artykuł natomiast wygląda że dwa razy wkleiłeś część konfiguracji, pod headerem
# Path to your oh-my-zsh installation.
Pozdrawiam
Piękne dzięki za zwrócenie uwagi. Już poprawione.
Pozdrawiam